Wednesday, July 8, 2015

Why Do You Meme?

Recently, I have been reading numerous posts with people complaining that they don't like the political rants, religious (or non religious) views, celebrity gossip, etc. they see on Facebook and other social networking sites.  I actually like reading some of the above things, because I feel it gives you some insight as to how people think about things that may not come up in everyday conversation.  Some will say everything online is fake and blah blah blah, but we are all entitled to our own opinions.  A number of people have even said they have been deleted or they are deleting certain people who make references regarding any of the above things. SAY WHAT?!

How about this category: PEOPLE WHO PRIMARILY SPEAK USING MEMES?

Some of the memes I read are pretty funny - don't get me wrong.  However, if you are a person who uses memes as a form of communication more than any other avenue, please explain the thought process behind that.  I am serious; I really would like to read your thoughts on this.  It is something I have often wondered while perusing my Facebook news feed.

image via memegenerator.net
Here’s why: 
Many memes are passive aggressive or used in a way to demean another person (or group of people) you are upset with or simply don’t agree with, but just don't or won't tell them straight up.  Plus, if you have already told the person (or people), then is the meme just another punch in the gut or a way to bully specific groups?  Either way: It is not nice, people!
image via quickmeme.com

A large number of memes have typos that are so bad, even if the meme is hilarious, I can't “Like” it.  (Please, don’t get all CRAZY.  I make typos, too – but when I realize it, I correct them with the quickness).

http://www.quickmeme.com/img/c4/c4dd43e6c4c321c0f0ebb5b6f93a93d8ee6ea7785ba7653e082e426350c4b1f1.jpg
image via quickmeme.com

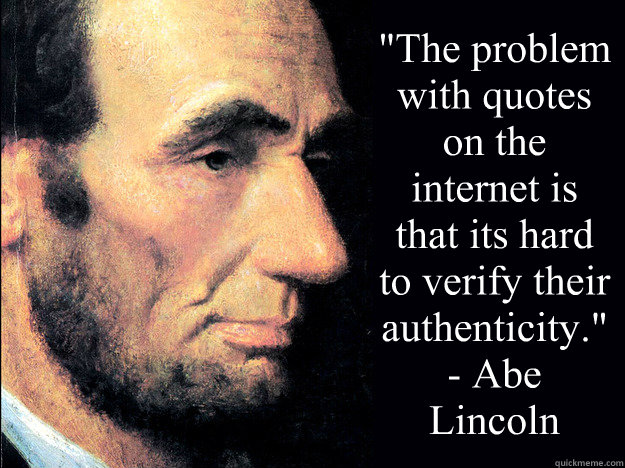
Some memes claim to be “quotes” that the famous person they are quoting never even made.  Go figure, eh?
image via quickmeme.com

So, tell me – Why do you Meme?

Thursday, May 21, 2015

The Great Motorhome Reveal

Hey everyone!  I know it has been forever since I posted any information on our 1998 Jayco Eagle Class C RV, but I am finally making the time to update you all.  Long story short - we replaced the entire roof, rebuilt the front bunk and part of one wall, painted the interior, removed the carpet and replaced it with hard surface flooring, re-wired most of the RV, added 450 watts of solar panels, an air ride suspension, new tires, LED lights throughout, had brand new foam cushions made and upholstered, replaced all of the window coverings, replaced the awning, etc.  We kept the original appliances, shower, sink and counter surfaces.  There were a few minor mechanical adjustments along the way in regard to the generator and engine, as well.  All of the above took about 11 months from start to finish.  11 months of hard, back breaking work.  There were moments where I could not even look at the project because it caused so much anxiety.  We originally purchased this RV for $10k and over the next year we added approximately $8k to that cost in renovations and upgrades.  We have been offered $30K for it at an RV show and all of our friends ask if they can buy it, so we know we could get our money out of it if we ever wanted to.  For now, it suits our little family of three (sometimes four, if you count my mom) and we couldn't be happier.

The pictures tell a better story than I ever could, so here goes...


1998 Jayco Eagle Class C RV parked on our property in Southern California

Removing front bunk
Front bunk rebuilt

New Floors in Progress


Painting the Cabinets

Painting the Interior
Painting the Cabinet Hardware

Polishing the Exterior

Replacing the Dicor Roof

Installing Solar Panels
New Day-Night Shades Installed

Interior After

Bathroom After

Bathroom Shower After

My Little Happy Camper on a Road Trip

We have used the RV lots of times for day and weekend trips.  We have only stayed in the Southern California area, but plan on going a bit further this Summer.  When people see all of the work we have done they always ask, "Would you do it again?" and our answer is, "We could do it again, but would rather not!"

Another question I often get is why did I choose to go with a white and light grey palette and is it hard to maintain.  Honestly, I love all things white and it is super easy to maintain.  I wash the bedding when we return from a trip just like I would anyway, so it has been very easy.  All of the painted surfaces are easy to wipe down and I steam mop the floors.  Easy-Peasy!

Feel free to post any questions you may have and I will try my best to answer them.  I plan on posting another blog in the future with all of the particulars (brand names, products, etc.), but for now this will have to do.  Until next time...

Happy Camping!

Sunday, April 26, 2015

PS4: How to Share your Digital Content with a Second PlayStation 4

Before the Internet, if you wanted to play a game you had purchased on a second console, all you had to do was take the disk and pop it in that console.  These days things aren't so simple.  Or are they?

original image via GameSpot

Have you ever wondered if there was a way you could share your digitally purchased games, map packs, etc. across multiple consoles without having to purchase it all again?  Well, I have often wondered this exact thing.

A Little Background:
Back in the day (circa 2004), before my now 10 year old son was into gaming, life was easy.  I liked a game - I bought a game.  Easy-peasy.  Fast forward to the present time and when a new Call of Duty game drops I am pre-ordering multiple copies.  Whatever.  I am used to it, however, thanks to current technology and the vast library of available online games and downloadable content (DLC) I have found a way around having to purchase multiple copies of any game, as well as the DLC that goes along with it.

Are you ready?  Here is how it works.  (For reference - I actually just did this last night using two PlayStation 4 (PS4) consoles and the game Destiny).

The Situation:
So, I have (2) PS4 consoles, my PSN ID (cpu22girl) and my son's PSN ID.  I have multiple digital games, but for the sake of this post I am using Destiny and the Destiny Expansion Packs as my example.  My son wants to play Destiny on his own console using his own PSN ID.  I do not want to have to repurchase the exact same game and DLC in order for him to do so.

You may already know this, but ANY digital content you purchase on the PS4 console you have designated as your "Primary" console can be shared with ALL users on that same console.

Here is a little excerpt taken directly from the PlayStation Knowledge Center (AKA PlayStation Support Forum):

By activating your PlayStation 4 as primary you can enjoy numerous benefits and actions

  • Anyone who uses your Primary PS4™ system can enjoy applications you purchase from PlayStation®Store.
  • You can automatically download to the PS4 system content you pre-ordered, or content purchased on PlayStation®App.
So, here is what you will need:
  • (2) PS4 consoles
    1. Console #1 - Main console you have set as the "Primary" for your PSN account.  This is the PSN account you have purchased your digital content on.  Also, this is the console your child (spouse, friend, etc.) will now use with their PSN account.
    2.  Console #2 - Secondary console which you will now use for yourself.
  • (2) PSN Accounts (PSN ID's).  Please note - Per PlayStation: "To enjoy certain PlayStation Plus benefits, you must subscribe to the service."  So, in order to play games online, each PSN Account MUST have their own PlayStation Plus Account.  If your child is not into online gaming, then you should be fine with just using (1) PlayStation Plus account
How to share your DLC with another PS4 user: 
If you haven't already done so, turn on your PS4 (Console #1) and add your PSN account to it, be sure you designate this console as your "Primary" console.  (The first time you sign in to your PSN account you will be prompted to activate the console during the sign in process).

"Activate as Your Primary PS4" Option Screen
If for some reason, you do not see the above screen on your console, you can activate it as your primary console by following these steps:

After you have signed into your PSN Account: Select [PSN] > [Activate as Your Primary PS4] > [Activate].

Next, add the second PSN account (this is the account that belongs to your child, spouse, relative, etc.) to the console you have designated as your primary console (Console #1).  This console will now be the secondary user's console.  In my case, this is the console my son will use.

Also, fair to note - you should probably add a passcode to your account and disable the automatic login feature on this console.  This will make it so the other user will not automatically be signed into your PSN account when they turn the PS4 on.  Trust me; there is nothing worse than being in the middle of a firefight and then losing your connection because someone signed in on your primary console as you!

How to Add a Passcode to your Profile on your PS4

How to set a passcode for your profile: Go to [Settings] > [Login Settings] > [Passcode Management] and choose your passcode.

How to ensure that your account is not set up for automatic login on the PS4: Check [Settings] > [Login Settings] and make sure that the setting is off.

Next, add your own account to the second PS4 console (Console #2).  DO NOT designate this as your primary console.  Per PlayStation: "You can activate only 1 PS4™ system per account."

Next, start downloading all of your previously purchased digital content.  This is the console you will now use as your main console, even though it is not the console you have selected as the "primary".

We followed the above steps last night and this morning my son was playing online, via his own PSN account on his own PS4 console.  He was able to jump into a game of Destiny and also had all of the DLC Expansion Packs that come with the Destiny Expansion Pass.

I hope this helps save you from purchasing multiple copies of the exact same game and DLC in the future.

Happy Gaming!

Wednesday, February 11, 2015

Sausage Fried Rice Recipe

Numerous people have asked me for this recipe, so I figured I should type it up for anyone who loves fried rice.  The best part is this recipe is easy, quick and cost effective to make.

(Recipe Credit: One of my long time friends taught me this recipe when we were teenagers.  I think I remember her saying it was her Grandmother's recipe, but she tweaked it a bit.)

Here's what you'll need:
  • 1 package of sausage links (I use Farmer John's brand)
  • 3 carrots, peeled and sliced
  • 2 broccoli crowns, separated into bite sized pieces (pulling the broccoli apart works better than cutting the pieces)
  • 1 bushel of green onions, diced up
  • Soy sauce to taste (I use Kikkoman's reduced sodium)
  • Freshly ground black pepper to taste
  • 1 egg (optional)
  • 2-3 cups of long grain white rice (I usually use my rice cooker to cook the rice, but have used the frozen steam bags in a pinch)

Directions:
  • Start cooking your rice per the instructions for your specific rice cooker or steam bags
  • Using medium to high heat - Cook the sausage links in a wok or large pan.  Brown and crumble.  The smaller the pieces, the better.  Depending on how spicy you want your fried rice, you can add some fresh black pepper while the sausage is cooking.
  • Once the sausage is browned, use a spatula to push the sausage to the outer area of the pan, creating a ring, leaving the middle of your pan for the veggies.
  • Add the carrots and broccoli first.  I usually let them fry/steam with a lid on for about 8-9 minutes.  The oil from the sausage helps fry them and the moisture from the veggies creates steam.
  • Once your carrots are soft enough to easily cut through, add the green onions.
  • Mix all of the veggies and the sausage together.  I leave my glass lid on and cook for about another 5-6 minutes.  Add more freshly ground black pepper if you'd like.
  • Once your veggies are nice and steamed (not limp), add your rice.  Mix thoroughly.
  • Add soy sauce.  A few tablespoons to start, and more as needed.  You want to keep mixing it all in really well and the soy sauce should just barely coat the rice.  If you see rice that is still all white, mix better or add a little more soy sauce.  Add more black pepper if needed.
  • Optional - if you want to add an egg (I've even used 1/4 cup of egg beaters before), move the rice mixture to the edges of the pan, again, creating a ring and leaving the middle of the pan open.  Add your egg.  Your pan will be really hot, so it only takes a few seconds to scramble the egg.  Once the egg is cooked, mix it into the rice mixture.

Voilà.  You just made the best fried rice ever!

PS this dish works great hot or even once it cools (like for a pot luck or BBQ).  You can also use different veggies.  For example, tonight I was running low on carrots, so I added in some diced sweet orange, yellow and red peppers.

I used My Fitness Pal to figure out the following basic nutritional information for this recipe (please note, this is not going to be 100% accurate, just a base based on the ingredients used and approximately 5 servings per pan):


If you try this recipe, please post your pictures in the comments section.